

Our Guide to Creating Your Own Home Music Studio
- Dec 10, 2025
- 3 min read
Building a home music studio can transform your creative process and give you the freedom to produce music at your convenience. Whether you want to record vocals, mix tracks, or experiment with electronic sounds, setting up a functional and comfortable space is key. This guide walks you through the essential steps to create a home music studio that fits your needs and budget.
Choosing the Right Space
The first step is selecting a room or area that suits your studio needs. Look for a space that:
Is quiet and isolated from household noise.
Has minimal echo or reverb (rooms with carpets and curtains work better).
Offers enough room for your equipment.
A spare bedroom, basement, or even a large closet can work well. Avoid rooms with lots of windows or hard surfaces that reflect sound excessively.
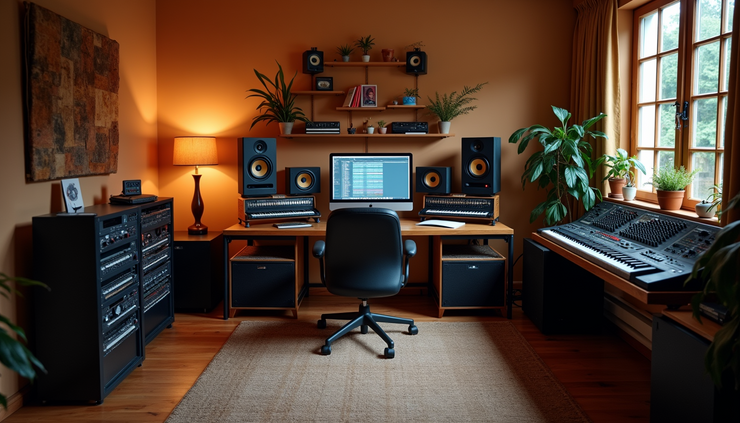
Essential Equipment for Your Studio
Your gear will depend on the type of music you want to create, but some basics apply to most setups:
Audio Interface: Connects your instruments and microphones to your computer. Look for one with enough inputs for your needs.
Microphones: A good condenser mic is versatile for vocals and instruments. Dynamic mics work well for louder sources.
Studio Monitors: These speakers provide accurate sound for mixing and mastering.
Headphones: Closed-back headphones help isolate sound during recording.
Digital Audio Workstation (DAW): Software like Logic Pro or ProTools lets you record, edit, and produce music.
MIDI Controller: Useful for playing virtual instruments and programming beats.
Start with quality essentials and upgrade as your skills and budget grow.
Setting Up Acoustic Treatment
Good sound quality depends on controlling how sound behaves in your room. Untreated rooms cause reflections and echoes that muddy recordings and mixes. Acoustic treatment includes:
Absorption panels: Reduce reflections by absorbing sound waves.
Bass traps: Control low-frequency buildup in corners.
Diffusers: Scatter sound waves to prevent harsh echoes.
You can buy professional panels or make DIY versions using foam or dense materials. Place panels at reflection points, such as behind monitors and on side walls.
Organizing Your Workflow
A cluttered space can disrupt creativity. Arrange your gear for easy access and comfort:
Position your desk and monitors at ear level, forming an equilateral triangle with your listening position.
Keep cables tidy with clips or sleeves.
Use shelves or racks to store instruments and accessories.
Ensure good lighting to reduce eye strain during long sessions.
A well-organized studio helps you focus on music instead of fumbling with equipment.

Tips for Recording and Mixing at Home
Record in a quiet environment: Turn off noisy appliances and close windows.
Use a pop filter: This reduces plosive sounds when recording vocals.
Monitor at low volumes: Protect your hearing and catch mix details.
Reference other tracks: Compare your mixes to professional songs to improve balance.
Experiment with microphone placement and room setup to find what sounds best.
Budget-Friendly Ideas
You don’t need to spend a fortune to start making music at home. Consider:
Buying used gear from trusted sellers.
Using free or affordable DAW software options.
Creating DIY acoustic panels with household materials.
Starting with a simple setup and expanding over time.


Comments